Embedding: Connecting the Pieces
Consolidate and contextualize your online content.
What is It?
Embedding is a way of nesting live content from one part of the web into another part. For example, you might embed an editable Google Doc syllabus into your course. Students will see your always-up-to-date syllabus in the right place and in context, but your management and editing of the syllabus remains inside of Google Docs. Through embedding, you have brought these two locations into one.
An embed is like a window to another part of the web. Your course in Canvas is the structure, and the embedded object is what you can see from one of the window frames that you build into that structure. The scenery from that window – an assignment, a video, a slideshow – can change dynamically and separately from the permanent structure around it.
Embedding is recommended because it simplifies management of course content and creates a more seamless experience for students. Learning management systems such as Canvas are not ideal for hosting and organizing lots of materials and are not suited to serving large files like videos. Let an external service handle these and pop them into your course via embedding.
How Can I Use Embedding in My Course?
Research into online course design shows that students can become easily confused about locations of course content if it is not well organized and clearly presented. A consistent course structure ensures that students know what they are required to do. Students don’t want to go to more than one place to view course content if they don’t have to. And in terms of delivery, choosing the right tool for a certain kind of content is important. Embedding allows you to do to this, for example with video hosted in YouTube or Kaltura. Another example would be an embedded Google Document as shown below.
View or print document from Google Docs
Questions and Considerations
How do I actually embed something?
Just like adding a new window to your house requires some power tools and some know-how, adding an embedded item also takes a bit of handiwork. Websites that allow content to be embedded externally will give you what is called an “embed code.” You need to copy this embed code exactly into the HTML edit view for the content area that you wish you place it in. Sometimes you have to search a bit for the embed code, but most of the examples given above have easy to grab embed codes.
A commonly used type of embed code is called an “iFrame.” Here’s what an iFrame code looks like:

The <iframe at the beginning and the /iframe> at the end are what open the window on that page. The width and height items are what determine the dimensions of that window. Finally, the web address that comes after src= is the target content item that will show up through that new window.
What the code at left looks like when embedded:
Helpful How-to Instructions
These links that can help you move beyond these basics and get accurate embed codes for various types of content:
- Google Docs, Slides, Sheet, or Drawing
- Content hosted in Google Drive (this tutorial focuses on video, but the method works for any type of file)
- YouTube
- Kaltura Video into Canvas
- Soundcloud Audio
- Voicethread
- Quizlet
Things to be aware of:
An embed code is only as good as the content it points at. If the service for your embedded item is down, then the embed will not work even if Canvas is up and running. If you or the content owner or a copyright claimant take down the content, then the embed will not work. If the external service shuts down permanently (this happens!) then the embed will no longer work. Keep track of what content you are embedding to make sure it is current.
Sometimes the size of the window frame you’ve created doesn’t match the content you want to show in it. This is the only part of the code you’ll ever have to touch. Luckily, the change is straightforward. At the beginning of the code, find the width and height items. There is a number after each. These determine how large the window is in pixels. Don’t be afraid to fiddle with these numbers. Instructional designers do it all the time, and sometimes trial and error is the only answer.
Common sizes for embedded items:
- YouTube video: width=”640″ height=”360″
- Kaltura video: width=”608″ height=”378″
- Google Doc syllabus: width=”850″ height=”1100″
- Soundcloud Audio: width=”700″ height=”166″
In Practice
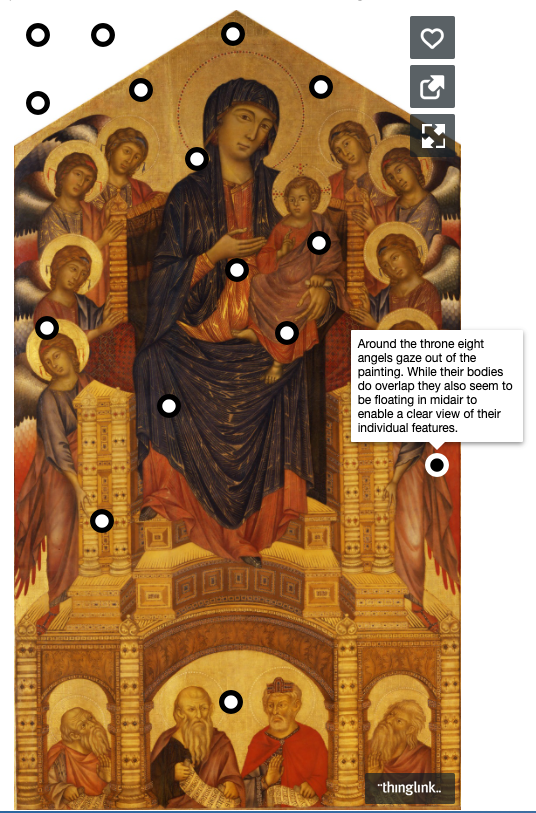
ART 262
Dr. Zoë Marie Jones’s World History of Art II Course site uses embeds extensively for Kaltura video lectures and annotated images from ThingLink. These work together to create the experience of a guided walk through an art gallery. Check out this section of the gallery on the Early Renaissance.